Lazy 30-Minute Ravioli Lasagna That Feeds the Whole Family
This ravioli lasagna uses frozen ravioli as the pasta layer so you get all the comfort of classic lasagna in about 30 minutes with barely any effort. It is freezer friendly, budget-friendly, and the kind of dinner the whole family actually asks for again.
 Jul 20, 2026
Ingredients
Step-by-Step Method
Preheat and prep your dish
Preheat your oven to 400F (200C). Lightly grease a 9x13 inch baking dish with a little cooking spray or a drizzle of olive oil. Mix the marinara sauce with the water in a bowl or just swirl the water right in the jar and shake it up.
Spread the base layer
Spoon about one third of the thinned marinara sauce across the bottom of the baking dish in an even layer. This stops the ravioli from sticking and keeps everything moist as it bakes.
Add the first ravioli layer
Arrange half the frozen ravioli in a single layer over the sauce. They can slightly overlap but try to keep them fairly even. Sprinkle over the garlic powder, Italian seasoning, a little salt and pepper.
Add ricotta and more sauce
Drop small spoonfuls of the ricotta cheese evenly over the ravioli layer, then pour another third of the marinara sauce over the top. Spread it gently with the back of a spoon.
Add the second ravioli layer
Arrange the remaining frozen ravioli on top in another even layer. Pour the rest of the marinara sauce over everything and spread to cover as much of the ravioli as you can.
Top with cheese
Scatter the shredded mozzarella evenly over the top, then finish with the grated parmesan. The parmesan helps the top get a little golden and gives a nice salty bite.
Cover and bake
Cover the dish tightly with aluminum foil, crimping the edges so steam stays in. Bake in the preheated oven for 20 minutes. This is where the frozen ravioli cooks through and everything melds together.
Uncover and finish
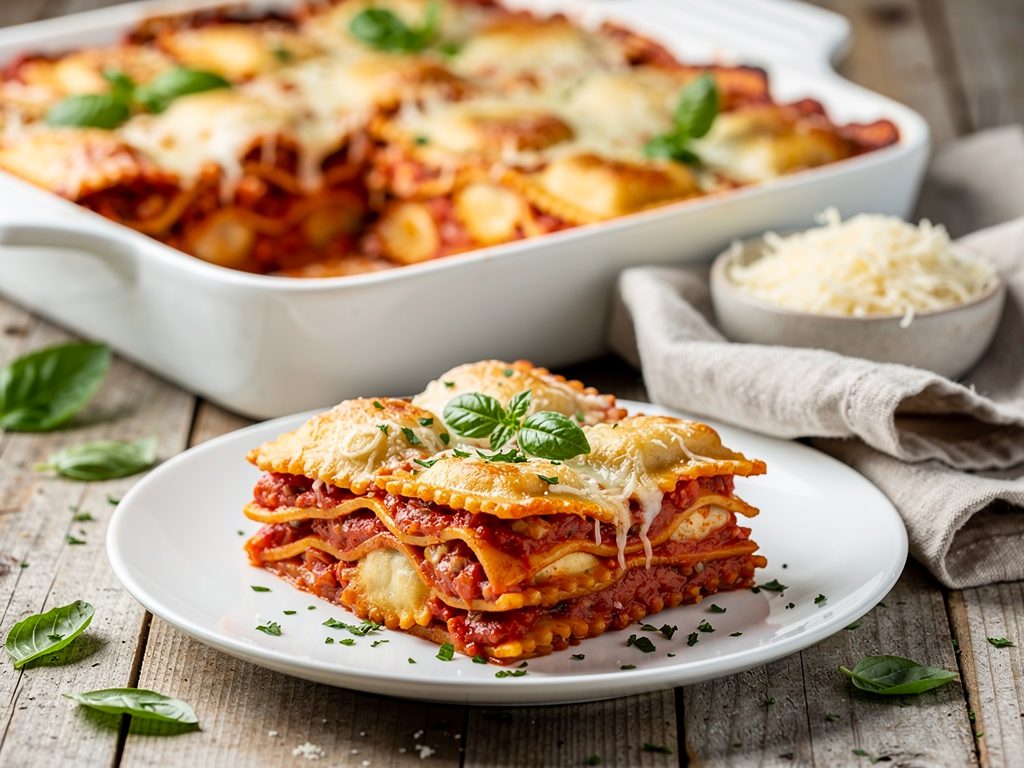
Remove the foil and bake for another 10 minutes until the cheese on top is melted, bubbly and just starting to turn golden in spots. Remove from the oven and let it rest for 5 minutes before serving. Garnish with fresh basil or parsley if you like.
Some nights I just cannot face boiling lasagna sheets, making bechamel, and doing all the layering. This ravioli lasagna came out of one of those nights, and honestly it has become one of the most-requested dinners in my house. You use frozen or refrigerated ravioli as your pasta layer, which cuts the prep down dramatically and still gives you that same cheesy, saucy, comforting result everyone loves. The USDA leftovers and food safety guide covers safe storage times in more detail.
If you enjoy easy recipes like this one, you will also love Freezer Friendly Turkey Chili, 5-Ingredient Budget Pasta Dinner, and Make Ahead Chicken Burritos Freezer Meal.
Why This Recipe Works
- No boiling pasta separately. The ravioli cooks right in the dish as everything bakes together, which saves time and washing up.
- Budget friendly. A bag of frozen cheese ravioli, a jar of marinara, some shredded mozzarella and a handful of pantry staples is all you need. Most weeks it comes in well under $12 for the whole pan.
- Freezer ready by design. This is one of those recipes that actually tastes better the next day, and it freezes beautifully for up to three months.
- Crowd pleaser. Even picky kids who claim they do not like lasagna eat this without complaint, because it just looks like cheesy pasta bake.
Honest Cooking Tips
Cover the dish tightly with foil for the first 20 minutes. This traps steam and helps the ravioli cook through without drying out. Only remove the foil for the last 10 minutes so the cheese gets golden and bubbly on top. If your marinara sauce is quite thick, add a small splash of water or broth to the jar and swirl it around before pouring, it keeps things saucy enough throughout. Also, do not skip the layer of sauce on the very bottom of the dish. It stops the ravioli from sticking and burning. One more thing: let it sit for about 5 minutes after it comes out of the oven before you cut into it. It holds together so much better that way.
Variations and Substitutions
- Meat lovers version: Brown half a pound of ground beef or Italian sausage with the onions before layering.
- Veggie packed: Add a layer of sauteed spinach, mushrooms or zucchini between the ravioli layers.
- Different ravioli: Cheese ravioli is classic but spinach and ricotta or beef ravioli all work well here.
- Dairy free: Use a plant based mozzarella and skip the ricotta dollops. It still melts and bubbles nicely.
- Sauce swap: If you want a slightly richer result, mix a couple of spoonfuls of ricotta into your marinara before layering.
Serving Suggestions
A simple green salad with a sharp vinaigrette cuts through all that cheese nicely. Garlic bread is always welcome alongside, and if you want to stretch the meal further for a larger group, a bowl of roasted broccoli or a caesar salad on the side does the job. This is a sit-down-at-the-table kind of dinner that makes everyone feel like you put in way more effort than you actually did.
Storage and Reheating
Leftovers keep in the fridge for up to four days covered tightly. To freeze, let the baked lasagna cool completely, then cut into portions and wrap each one individually in cling film before putting them in a zip lock bag or airtight container. They keep well for up to three months. Reheat from frozen in the oven at 375F covered with foil for about 30 minutes, or microwave individual portions on medium power until heated through. A tiny splash of water before microwaving keeps it from drying out.
Frequently Asked Questions
Can I use fresh ravioli instead of frozen?
Yes, fresh refrigerated ravioli works perfectly. You may need to reduce the covered baking time by about 5 minutes since fresh pasta cooks faster than frozen.
Do I have to thaw frozen ravioli before layering?
Nope, straight from frozen is fine. The steam inside the foil-covered dish does the work. This is actually what makes this recipe so easy on busy evenings.
My sauce looks a bit dry after baking. What went wrong?
This usually happens when the foil is not sealed tightly enough and the steam escapes. Make sure the edges are crimped well. Adding that splash of water or broth to your jarred sauce before using also helps a lot.
Can I assemble it the night before and bake it the next day?
Absolutely. Assemble everything, cover tightly and refrigerate overnight. When you are ready to bake, add about 5 extra minutes to the covered baking time since it is starting cold from the fridge.
This is the kind of recipe that earns its place in regular rotation. It is genuinely simple, the ingredients are inexpensive, and you end up with something that tastes like you fussed way more than you did. I hope it becomes a go-to for you the same way it has for me.