One Pan Honey Garlic Chicken Thighs Ready in 25 Minutes
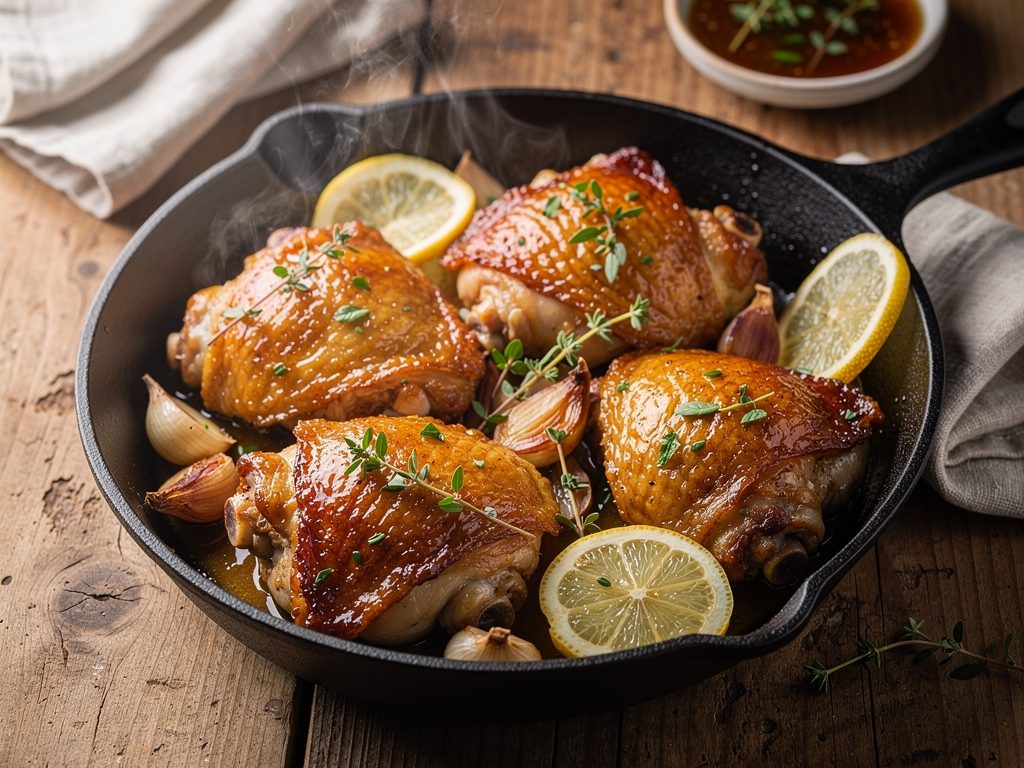
These one pan honey garlic chicken thighs come together in just 25 minutes with a sticky, savory sauce that tastes like you spent way more time in the kitchen. One skillet, simple ingredients, and barely any cleanup make this an easy weeknight win.
 Jul 20, 2026
Ingredients
Step-by-Step Method
Preheat and Prep
Preheat your oven to 400 F (200 C). Pat the chicken thighs completely dry with paper towels and season both sides with salt, pepper, and smoked paprika.
Sear the Chicken
Heat olive oil in a large oven-safe skillet over medium-high heat. Place the chicken thighs skin-side down and sear without moving them for about 5 minutes until the skin is deep golden and crispy. Flip and sear the other side for 2 minutes.
Make the Sauce
While the chicken sears, stir together the honey, soy sauce, minced garlic, and apple cider vinegar in a small bowl until combined.
Add the Sauce and Bake
Pour the honey garlic sauce over and around the chicken thighs in the skillet. Transfer the skillet to the preheated oven and bake for 13 to 15 minutes, or until the internal temperature reaches 165 F.
Rest and Serve
Remove the skillet from the oven and let the chicken rest for 3 minutes. Spoon the pan sauce over the top, garnish with chopped parsley, and serve immediately.
Some nights I just cannot face a pile of dishes, and that is honestly where this recipe was born. I had bone-in chicken thighs, a jar of honey, and a serious need for something that tasted like I tried harder than I did. These one pan honey garlic chicken thighs are now on rotation in my house at least twice a month, and my family genuinely gets excited when they smell that sauce starting to caramelize.
If you enjoy easy recipes like this one, you will also love Beef and Broccoli Stir Fry, Freezer Friendly Turkey Chili, and High Protein Shrimp Stir Fry.
Why This Recipe Works
A few simple things come together to make this better than it has any right to be for a weeknight cook.
- Skin-on chicken thighs stay juicy even if you get distracted and cook them a minute or two longer than planned.
- The honey and garlic sauce thickens naturally in the pan without any cornstarch fuss.
- One pan from stovetop to oven means the chicken picks up all those fond bits and the sauce coats every inch.
- 25 minutes total is genuinely achievable, not a stretched marketing claim. I timed it.
Honest Tips for Getting It Right
- Pat the chicken dry before it goes in the pan. Wet chicken steams instead of searing, and you lose that gorgeous golden skin.
- Use an oven-safe skillet, cast iron or stainless steel. Non-stick pans are not usually rated for the oven temperatures you need here.
- Do not crowd the pan. If the thighs are touching, move to a larger skillet or cook in two batches for the sear.
- Let the chicken rest for about three minutes after it comes out of the oven. The juices settle and the sauce thickens just a little more.
- Fresh garlic really does taste noticeably better than jarred here because it is the star of the sauce. Worth the thirty seconds of mincing.
Variations and Substitutions
- Boneless thighs work fine, just reduce the oven time by about five minutes and check for doneness at 165 F.
- Maple syrup can replace honey if that is what you have. The flavor is slightly earthier but still really good.
- Add a pinch of chili flakes to the sauce if you like a little heat against the sweetness.
- Low-sodium soy sauce keeps the saltiness in check without changing the overall flavor much at all.
- Chicken drumsticks are a budget-friendly swap and cook in roughly the same time.
Serving Suggestions
Honestly, steamed rice is the obvious choice here because it soaks up every bit of that sticky sauce, and that is a good thing. But mashed potatoes, egg noodles, or even a simple green salad on the side all work depending on what you are in the mood for. A quick steam of broccoli or green beans in the last few minutes of oven time in the same pan keeps everything to one dish and gives you a vegetable without extra effort.
Storage and Reheating
Store leftovers in an airtight container in the fridge for up to three days. The sauce thickens considerably when cold, which is actually great because it clings to the chicken even more. Reheat gently in a covered skillet with a small splash of water over medium-low heat, or in the microwave at 50 percent power to avoid drying out the meat. I would not freeze these once the sauce is on them as the sauce can separate a bit, but the cooked chicken on its own freezes well for up to two months. The USDA leftovers and food safety guide covers safe storage times in more detail.
Frequently Asked Questions
Can I use chicken breasts instead of thighs?
You can, though breasts dry out faster so keep a closer eye on them. I would pound them to an even thickness, sear both sides, and check the internal temperature at the 15-minute mark in the oven rather than waiting the full time.
How do I know when the chicken is fully cooked?
A meat thermometer inserted into the thickest part should read 165 F. The juices should also run clear when you pierce the thigh near the bone. If you are cooking bone-in pieces, always check near the bone since that area takes longest.
My sauce is too thin. What do I do?
Just put the pan back on the stovetop over medium heat for two or three minutes after removing the chicken. Stir and let it reduce until it coats a spoon. It usually sorts itself out quickly.
Can I make this dairy free?
It already is. There is no butter or cream in this recipe, which is one of the reasons it is a solid weeknight option for households with mixed dietary needs.
I hope this becomes your new go-to for those evenings when you need something genuinely tasty without a lot of effort or cleanup. Give it a try and let me know in the comments how it turned out for you.